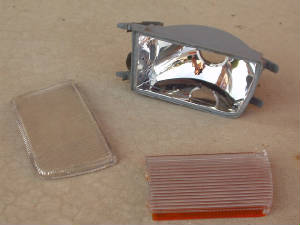
1.) Begin by removing both of the turn signal lenses from the vehicle; gain
access either through the dummy panels or un-installing long-style fog lights.
2.) Using a razorblade, slowly and carefully score the seal of the front lense and turn signal housing.
The two parts are siliconed together and can be pulled apart; make sure to utilize the razorblade to break the seal of the
silicone before applying force to open. ** Make sure to be
careful not to cut yourself! Using a new sharp blade will have better
results on seperating the two halfs. **
3.) Once the seal has been scored, gently pull apart the lense. Use a flathead screwdriver for needed leverage
if the lense doesn't want to budge. * Remember: the lense is made of plastic and can crack if too
much concentrated force is applied. *
4.) From the backside, through the light bulb hole, push out and remove the amber lense and attached light defractor.
Lay the housing face down and use a screwdriver and hammer to remove the plastic inserts. Some force may be need since
they are molded to the housing.
5.) Once removed from the housing, use the razorblade to clean off the remaining silicone on the housing and the
front lense. Avoid scratching the front lenses and reflective chrome paint on the housing.
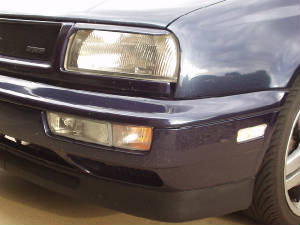
6.) Piece together and test fit the front lense and housing. Notice the turn signal is very transparent;
if you desire, the light defractor can be glued in the housing if desired.
7.) Using some clear RTV silicone, join the front lense and housing together.
8.) When cure, install newly cleared turn signal unto car. At this time you can use any proper color light
bulb for desired look.
9.) Re-install dummy lights or long-style fog lights; verify all electrical connections.