|
With having a United States / Canada spec MK3, there are several little
differences between it and the German (euro spec) counterpart. Another component is the headlight swtich; the original
has only two opitions, on and off. The euro headlight swtich allows for more independant functions of the parking lights,
front and rear (if installed) for lights, and headlights.
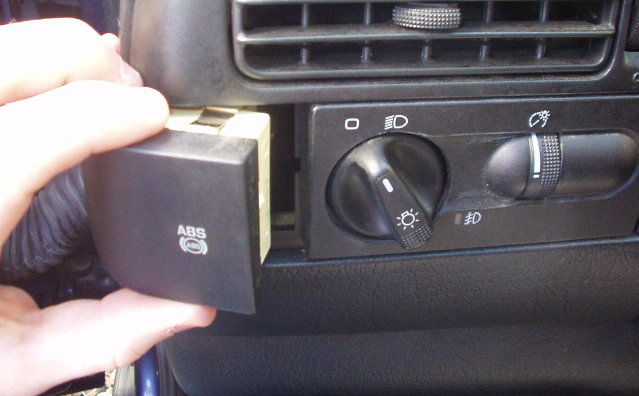
1.) Begin by removing the ABS or Airbag warning indicator trim /
light. Use two flathead screwdrivers to get behind the trim and use gentle force to pry them out. It's held in
by metal clips that do not need to be pressed in to remove the indicator.
2.) Move the ABS or Airbag out of the way to gain access the headlight switch release button.
The release is located on the left side of the switch; use a flathead screwdriver to push in the release while gently pulling
out the existing switch.
3.) Remove headlight switch from dash.
4.) Disconnect wiring harness by pushing in the retaining clips on the wiring connector.
5.) Take the Euro headlight switch, and plug into the existing wiring harness. * Note: at this time, if you wanting to disable your Daytime Running Lights (DRLs), please read and make
the DRL Removal modification at this time.
6.) Test switch to make sure all functions work. * Note: if
the OEM fog-light relay is installed, the fog lights will not turn on with the parking lights. Modification
to the fuse / relay panel by installing a Fog Light Jumper is needed to have the fog lights be available to turn on with the parking lights. *
7.) Line up the euro switch and re-install into the dash; once completely in you should
hear the release button clicking into position to hold the new switch in.
8.) Re-install ABS or Airbag warning indicator light / trim.
- Average Time:
10 - 20 minutes
- Scheduled
Maintenance: none - personal customization
- Price of Materials: Euro headlight
switch ~ $55.00+
- Written by Erik Melander
|
 |
|
With using a pair of screwdrivers, you can gently remove the ABS or Airbag
warning indicator. It is not nesscessary to unplug the trim from the harness to gain access to the headlight switch
release button.
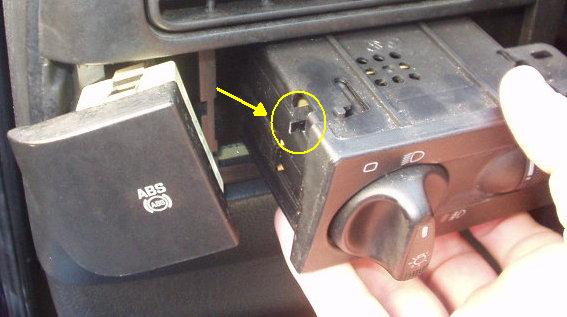
Above show the position of the release button on the switch.
When in the dash, it'll be behind a core support, and care must be taken when applying force to release the swtich.
Use a flathead screwdriver and push in the button and pull out on the switch simultaneously; it should release with little effort. Once removed from the dash, be sure not to yank on the
wiring harness connected to the switch.
|
|
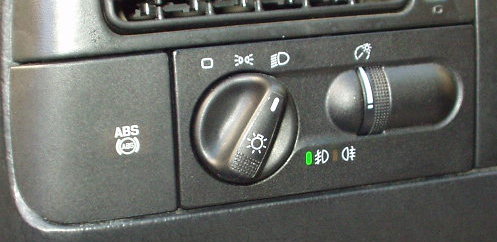
After finished installation, test out all the seperate functions of the
switch. Along with the jumper installed, theres a broad array of choices on combinations to run your exterior lighting.
Not much of a noticable interior difference, but its a great modification for running just the fog lights only at dusk / dawn
and photo shoots with your car!
|
|