|
With all the exterior enhancements that can be made, sometimes the little modifications can make a bigger difference
depending on taste. As you may be familar with the 1997 Driver Edition ("DE") GTi's that came with red powdercoated
calipers and carriers, that was enough color change to give the hatchback more of a styling edge. To follow suit, I
wanted the same on my GLX...
Day 1: To begin the brake painting project, it began to a trip to the junkyard..
Within an hour of snooping around, I came across a set of rear calipers and carriers (8.9" rear) from a 1999 Jetta
Wolfsberg. After checking to make sure they worked, I quickly disassembled them and took them home; that was easy!
However, I was still short on the front. Since already having the largest front OEM brakes available on the
GLX (11.3" front) and finding out that junked GLX's don't exist in my area, I had to resort to finding them through another
method. Buying new was out of the questions since I wasn't upgrading on size; just need a working set so that my car
wasn't out due to building down time. Before the day was done, I found myself searching the classifieds of Volkswagen
forums and trying to make deals on front calipers and carriers; unfortunatly... no deal was done. Rears were aquired,
but fronts were still being searched for.
Day 2: With no fronts to be found the day
before, the search continued over the internet. After many hours of questioning and playing e-mail tag, I finally located
and bought a set of front calipers and carriers off a 1998 Jetta GLX. Unfortunatly, time would be needed for them to
be shipped... so I directed my attention to the rear calipers and carriers, cleaning and degreasing began. Using an
old toothbrush and some concentrated Simple Green, the rear calipers were stripped of grime and dirt with in a hour.
They were set aside to let dry while I waited for the fronts to arrive at my house.
Day 3: A few days later, the front calipers
and carriers were left on my doorstep. After unpacking them, I noticed they were completely filthy from all the brake
dust; it looked like they were never washed at all. They took almost three times the effort to clean compared to the
rears due to all the dust and grime that was collected on them. Again, after cleaning, set them aside to air dry.
Once dry, I began to tape off parts of the calipers and carriers that were not going to be painted. This included all
the bleeder screws, the guide bolt openings, the pistons, the brake line opening, and finally removing the emergency
brake level conuterweight on the rear calipers. Once taped, they were all soaked with chlorinated brake cleaner;
that removed all the hand oil and residues from handling them. Set aside for the day to have the aerosal cleaner
completely evaporate.
Day 4: Next was to locate paint and primer
suitable for the high temperatures the brakes are subjected to. After consulting with some trusted gear-heads and forum
'know-it-alls' the night before, I was asured that high-temperature primer and paint was a must for a lasting finish.
After brabbing all high-temp Dupli-Color aerosal cans at a local auto parts store, I went home to set up my paint booth.
Using my ventilated basement, I seperated out the front and rear brakes on newspaper and paper cups and began to shoot
paint. The primer was laid in three thick coats, catching every square inch of exposed metal. After a few moments
of drying, a few coats of color base was applied to the underside of the calipers and carriers. And then a
double amount of base color was applied to the topside of the calipers and carriers. Once the color was completely on,
they were set aside to dry for a few hours.
Day 5: After letting the base coat sit and
dry for the evening, I was able to handle the calipers and carriers the next morning to double check color coverage.
However, soft touch was required since I found out to my dismay that the color base coat does not cure untill high heat has
been applied to the paint. The high-temp clear coat was next to be applied. Again, just like the color base, the
clear was shot on the underside of the calipers and carriers first before the topside finish coat. After finishing the
clear, they were stored out of harms way since the clear coat needed five days to completely cure.
Day 6: During the five day hiatous for the
clear to cure, I stumbled across a gentleman who created brake calipers decals as a side project. After looking over
his site and asking a few questions on fitment, I found myself spending some cash for some unique vinyl decals for my
brake project... just enough to spice things up. Once recieved, I placed them on the front and rear calipers and
gave the decals a couple coats of clear coat to resist pealing.
Day 7: After a few days of the last coat of clear, I removed all the taped areas
and cleaned up any overspray with an exact knife. The paint was dry, but still very tacky enough to where you could
scratch it off with force. Instead of being in a hury, I decided to let them sit for the full five days to cure before
installing them on my GLX.
- Acutal Time: 2 weeks
(start to finish)
- Price
of Materials: front calipers / carriers ~ $100.00
rear
calipers / carriers ~ $45.00
primer + paint ~ $20.00
vinyl decals ~ $15.00
- Written by Erik Melander
|
 |
|
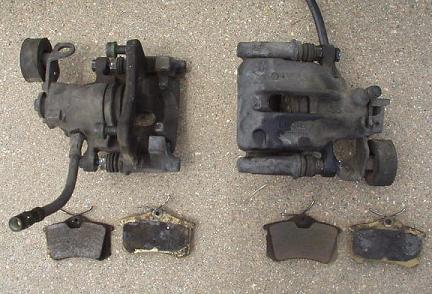
Shown above is the rear calipers + carriers along with the brake pads from
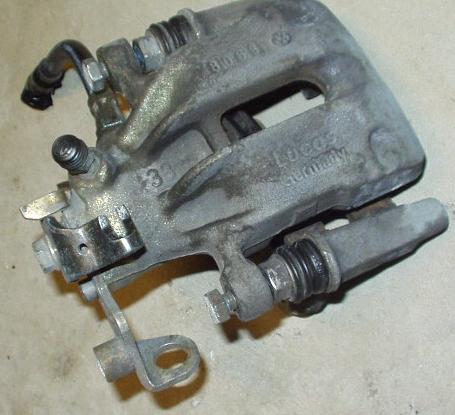
the junkyard. Just below is the passenger rear caliper + carrier after it was scrubed with Simple Green. Notice
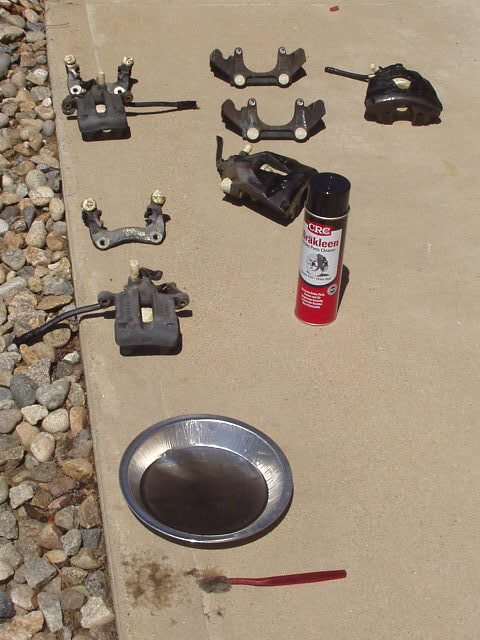
the original color of the brakes near the emergency brake lever. Far below is when all the parts were taped off and
the last part of cleaning was happening; still got alot off with the aerosal cleaner ever after the use of Simple Green.
|
|
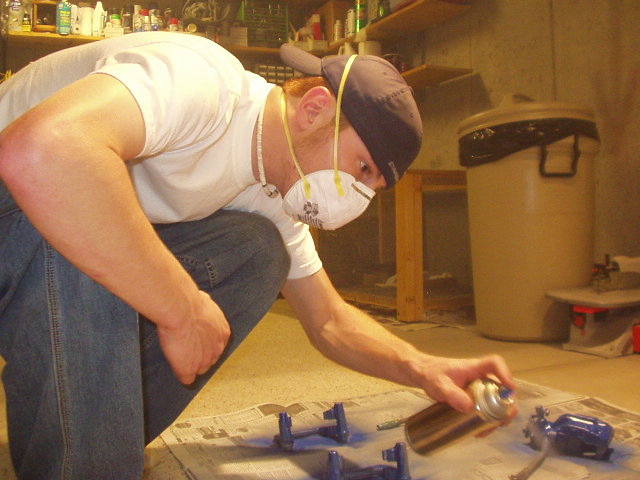
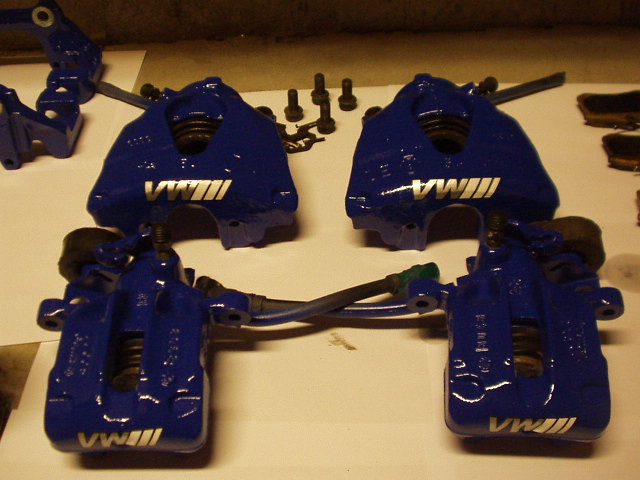
Above is myself painting; remember kids, safety first! Take breaks
for fresh air and always wear a fask-mask when working with airbone particulits. Below is the finished set of calipers
with the decals on; notice the clean detail of non-painted bleeder screw, piston, and bolt holes. When installed with
new shims and hardware, these will really shine and hold out great against the elements.
|
|