1.) Begin with the car OFF, and by removing the gas on the fuel tank.
This will help to releave pressure in the fuel lines.
2.) Locate the fuel filter underneath the car, near the passenger rear wheel. Lift
and support the vehicle carefully to prevent serious injury. Ensure that there is enough working space; in not, remove
rear passenger wheel or lift vehicle higher.
3.) To remove the filter, begin by gently removing the factory hose clamps on both
side of the fuel filter. ** Be careful NOT to pinch, punchure, or cut the rubber fuel
lines. Slicing them open will create more work since replacement of the lines is difficult. ** Use either
a pair of pliars or wire shears to cut the clamps; the factory clamps will not be reused, it's perfectly fine to wreck them
while taking them off.
4.) Remove both fuel lines from the fuel filter. Stand back from the open lines;
even though the gas cap was removed, residual pressure can still be present in the lines. ** Fuel
can spray out at high velocity. Do not get fuel in the eyes; if so, flush immediately with water for ten minutes.
Do not create any spark, flame or high heat around gasoline; it could ignite and create massive damage! **
5.) Unbolt the 17mm retaining nuts that hold the fuel filter housing in place. Pull
down the filter housing and filter; careful not to spill gas into eyes once again. Some force may be needed to remove
the filter housing from the vehicle due to the threaded fasteners on the housing.
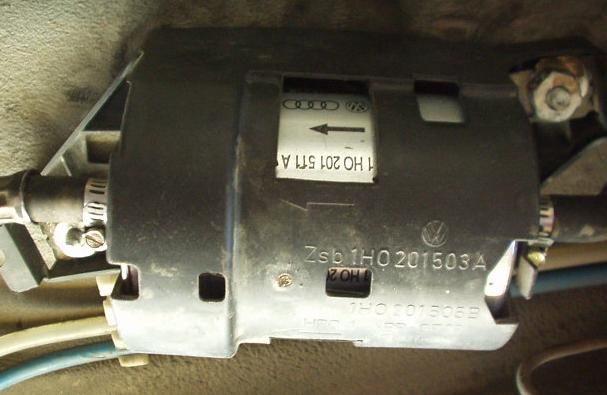
6.) Once the housing has been removed from the vehicle, replace the fuel filter.
* Note: make sure to install the fuel filter that same way it came out. Fuel filters have a
specific flow direction and gas must pass through only one way. *
7.) Re-install the filter housing to the vehicle with the new fuel filter. Again,
verify the flow direction of the filter; gas must pass from the fuel tank through the filter to the engine.
8.) Slide on new adjustable hose clamps over each of the fuel lines, and push the fuel
lines unto the new fuel filter. Tighten down the new hose clamps on the fuel lines.
9.) Re-install wheel (if removed) and lower vehicle. Turn the ignition key to ON
for 3 - 5 seconds to let the fuel pump pressurize the recently emptied fuel lines. Turn the key to OFF for a moment
and repeat pressurization. Check for gas leaks; if any leaks, locate and fix accordingly.
10.) Start car. Vehicle may fumble within the first 5 seconds of start-up, which
is normal. The fuel pump is pushing any traped air in the fuel lines through the fuel injectors. If misfire persists,
verify that the fuel filter is installing in the correct flow direction.
11.) Clean up accordingly and wash off any residual gas on or around the vehicle.